
There’s something soothing about creating your own mini plant terrarium in a cookie jar. Maybe it’s the colours, the tiny plants, or the way they look all tucked away in their little glass home. It feels like bringing a piece of nature indoors that can last all year round. I think what I love most is how simple it is once you have all the materials.
You gather the basics and you can use what you already have or find on a short walk. You can also purchase terrarium kits to help you build your terrarium magic. At the end, you have a small green world sitting on the table. It’s perfect for adults who enjoy making things and for loved ones with dementia who might find complicated projects overwhelming.
Terrarium jars can be big or small, the same logic applies to them, fill it with right materials to help the ecosystem of the plants to survive. If you’re loved ones have mobility issues, then just use a bigger cookie jar with wider mouth opening so you can use your hands instead of tweezers. You can scavenge for things like moss, or pebbles and stones to use in the jar.
I’ve done similar crafts before, like my autumn leaf luminaries, and I’ve found they bring the season indoors in a way that feels warm and homely especially if your loved ones has limited mobility.
So here are the steps to make your own beautiful mini plant terrarium which is a great cosy, dementia-friendly craft!
You will Need.
- A clean glass cookie jar, or clear container with a wide opening for easier access
- Potting or aqua soil mixed with perlite, sphagnum moss, coco fibre, and sand.
- Small pebbles, pea gravel or clay aggregate
- Activated Charcoal
- Cuttings from Plants that can thrive in a terrarium like types of Fern, String of Turtles, Fittonia and Selaginella
- Items for decorations like small rocks, acorns, or moss
- Tweezers, Painters brushes
- Fine Mist bottle or a pipette
Step 1: Prepare Your Container
Wash and dry the cookie jar glass so it is clear and free of smudges. Make sure that you position the jar so that any seams on the glass are on the sides before you start to create your layers.
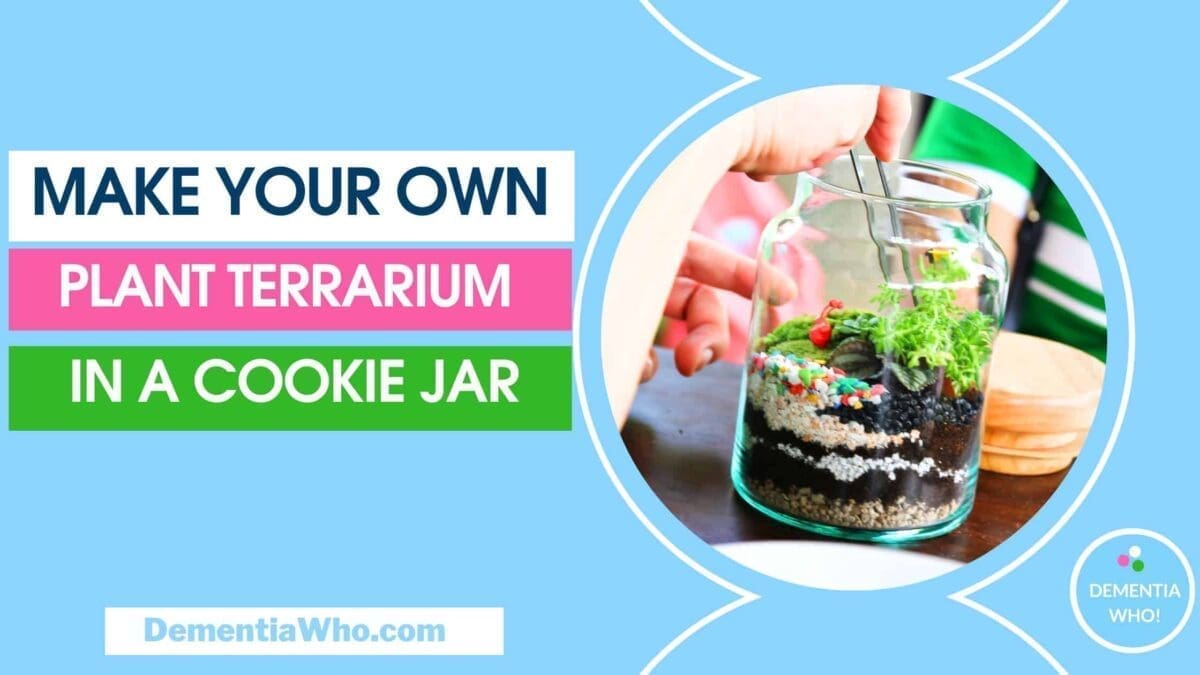
Step 2: Drainage Layer
Layer your jar with the small pebbles, gravel or clay aggregate to allow any excess water to drain into. Tap the layer down so that it is even all round. Then add some activated charcoal. These elements will help your soil from growing mould and remove bad odours. You also add different colours of sand to add a decorative feature depending on the size of your cookie jar. For larger jars, you may need to add a fine mesh layer or coffee filtration paper to stop the next layer from falling to the bottom of the jar.
Step 3: Substrate layer
This is the key part of the cookie jar that will help your plants live and thrive. You can also purchase these readymade kits that have all the materials needed to make your own terrariums. Add a layer of your mixed substrate materials into the cookie jar, you’re looking for the jar to be about one-third filled. You can use a painting brush to move the layer evenly across the bottom of the jar.
Step 4: Add Natural Extras
You want to add some flair so consider adding some twigs or small stones if you’re jar size will allow it. You can get these from your garden or on a walk, just make sure to wash them thoroughly. We’re trying to create a landscape here.
Step 5: Choosing Plants for Your Plant Terrarium In A Cookie Jar
You’ll want to choose small plants that won’t overgrow the size of your cookie jar terrarium. You can do some research as to which plants grow best. That’s a great activity to do with your loved one, spending time looking at plant books or videos to decide on the plants you’d like to see grow. You can also choose from these examples String of Turtles, Fittonia and Selaginella. You’re looking for plants that won’t overgrow the cookie jar (but even if they do, you can trim them down).
Get your plants and place them in the cookie jar, you can use tweezers if that will make it easier if your jar is particularly small. Read the instructions for the type of plants, as some may need to have their roots buried in the soil, others just touching.
Step 6: Decorative Touches
You can add some small items of decorations like pinecones, tiny, coloured pebbles or tiny figurines. You can add some moss as well to add more decorative finish.
Step 7: Watering The Plants
You need to add water to the jar to help your plants build their own ecosystem. I suggest using a small water mister, do not overdo the amount of water added, you just want the plants and soil to feel a little damp. You can also use a small pipette and just add a few drops of water down the side all around the jar. Then close the lid.
Maintenance
- Don’t place the terrarium in direct sunlight, place them somewhere they can thrive on a coffee table or a mantlepiece not in direct sunlight.
- As they grow you may need to trim or cut back some of the moss & plants so that there’s enough air for the plants to thrive and keep it look aesthetically pretty
- Wipe down the sides of the glass periodically where plants have grown up to ensure that they have enough light and not being blocked by algae growing on the sides of the jar.
- Keep an eye on water levels, theoretically it should maintain its own ecosystem with water coming from the evaporation in the soil and then condensing on the glass of a closed terrarium. But if your plants are turning yellow or the substrate layer looking really dry, think about giving them a fine mist but not too much or too often.
Final Thoughts
Making a plant terrarium in a cookie jar is one of those little projects that feels good from start to finish. It is hands-on without being complicated, and it gives you something beautiful to enjoy afterwards. The mix of layers, textures, and colours makes it interesting to look at and care for, and it can last for months with very little attention.
You can also make ones that are open rather than closed terrariums.
For loved ones with dementia, it can be a calming, sensory experience, from the feel of the moss to the smell of damp soil, and the end result is a small piece of nature you can enjoy together indoors. It becomes part of the home as you watch it grow in a way that is both soothing and full of life. Enjoy!
This post may contain paid and/or affiliate links. I make a small commission at no extra cost to you