
Making your own hand painted Christmas ornaments adds a personal touch to your decorations. It can be a relaxing activity to do with family, with children, or as a simple craft to share with someone living with dementia.
Painting baubles works because they’re simple, adaptable, but if that’s too difficult, this post also covers other options for decorating Christmas Ornaments as well.
This post may contain affiliate links. If you buy through them, I may earn a small commission at no extra cost to you. See our Privacy Policy for details.
- Why Baubles Are Easy to Try First
- Step by Step: Painting the Outside of a Christmas Ornament
- The Marbling Effect for Hand Painted Christmas Ornaments
- Filling Christmas Ornaments Instead of Painting
- Stickers and Embellishments for Handmade Christmas Ornaments
- Adapting for Dementia or Limited Dexterity
- Finally
Why Baubles Are Easy to Try First
Christmas can be a noisy and busy time. A familiar task like decorating the home can offer a calmer space for someone living with dementia.
I’ll bet you’ll be surprised by someone’s artistic talents as you paint simple stars, they could be painting beautiful flower designs or montage designs.
Just keep it simple by having everything to hand, with a few colours, a chunky brush, and everything visible on the table. You don’t need a theme or finished design, just a place to sit, have a natter and try something side by side.
You may find that your local craft shops or activity groups may be holding decorating ornaments sessions so check your local area to see what’s going on as well.
What You’ll Need
- Clear plastic, ceramic, or glass baubles
- Acrylic paints
- Tacky glue or mod podge
- Paintbrushes with chunky handle or adapted grip
- Old tablecloth or newspaper
- Cotton wool or tissue paper
- Ribbon, twine, or simple stickers
- Egg carton, styrofoam, knitting needles, straws or sticks, and masking tape (optional)
- Glitter (optional)
- Funnel (optional)
You can lay everything out before starting so there’s no searching for tools mid-way. This can make it easier for someone living with dementia to take part without needing instructions.
A covered table helps with mess. If dexterity is limited, the paintbrush handle can be wrapped with tape or foam for easier grip.
Step by Step: Painting the Outside of a Christmas Ornament
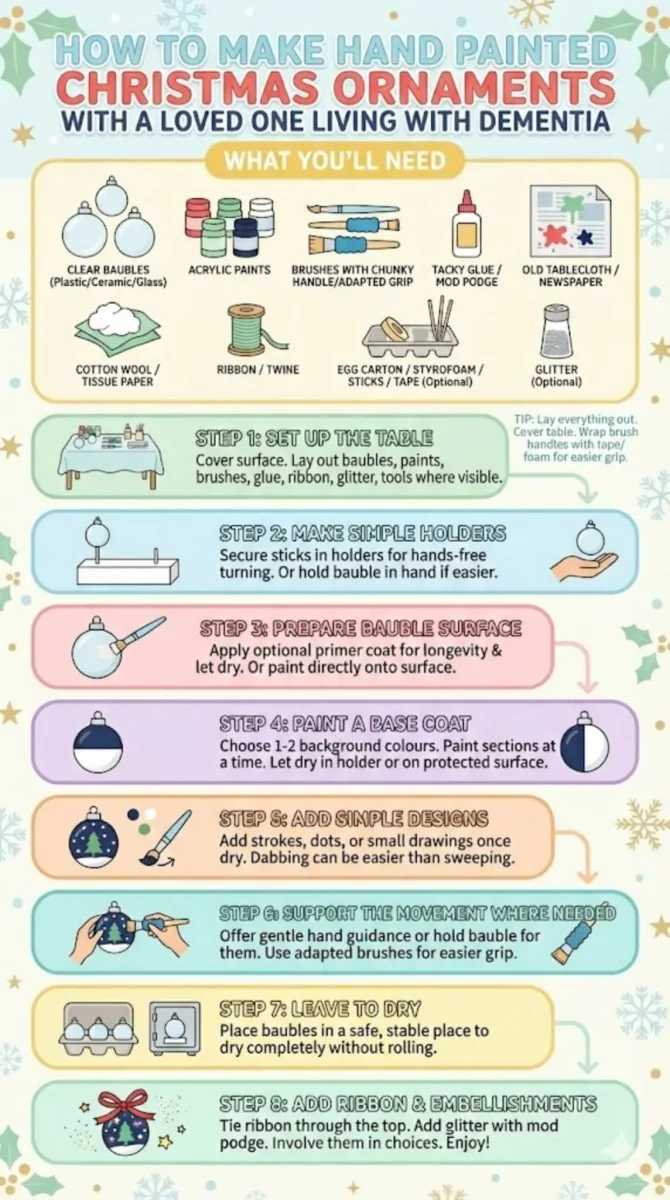
Step 1: Set up the table
- Cover the table with an old tablecloth or newspaper.
- Lay out the baubles, paints, brushes, glue, ribbon, glitter and any optional tools where you can both see them.
Step 2: Make simple holders for the baubles
- If you are using knitting needles, straws or sticks, push them into styrofoam or an egg carton and secure with masking tape so they stand upright.
- Place the bauble on the end of the needle or straw so it is easier to turn and paint without having to grip it tightly.
- If that feels fiddly, you can skip this and simply hold the bauble in your hand.
Step 3: Prepare the bauble surface
- If you want the paint to last longer, you can add a light primer coat first and let it dry.
- If you prefer to keep it simple, you can paint straight onto the bauble without priming.
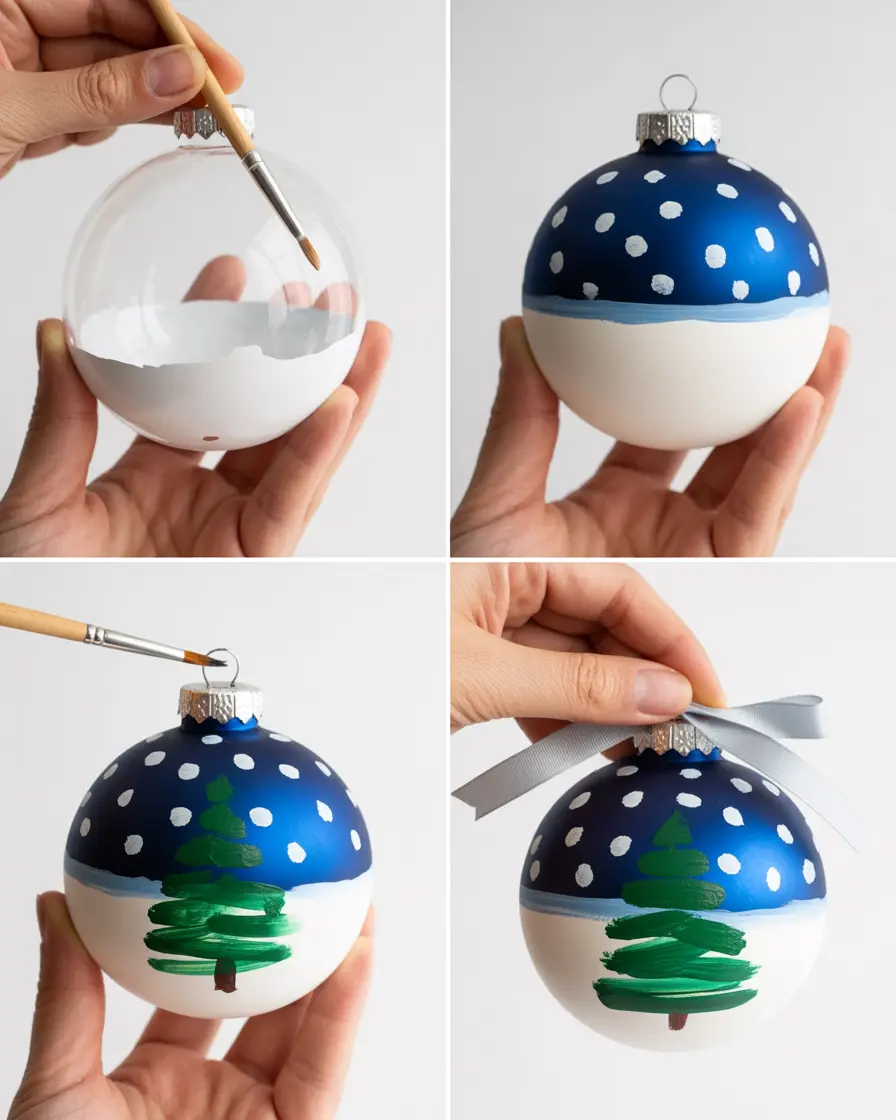
Step 4: Paint a base coat
- Choose one or two colour for the background.e.g white bottom half and navy top half
- Paint the whole bauble or one side at a time, depending on how easy it is to hold.
- If you are holding the bauble in your hand, paint one half, place it gently in an egg carton or on a protected surface to dry, then come back later and paint the other side.
Step 5: Add simple designs
- Once the base coat is dry, add simple strokes, stripes, dots or small drawings on top. E.g like white dots on navy to look like snowfall, a green Christmas tree
- Keep the colour choices limited if that helps reduce decision making.
- If controlling the brush is hard, dabbing the brush onto the surface instead of sweeping it can work better.
Step 6: Support the movement where needed
- You can hold the bauble while your loved one paints, or gently guide their hand on the brush if that feels comfortable.
- If gripping is tiring, use brushes with thicker handles or wrap tape or foam around them to make them easier to hold.
Step 7: Leave the ornaments to dry
- Place the baubles somewhere safe to dry where they will not roll or be knocked.
- You can rest them in an egg carton, on styrofoam, or keep them on the sticks or straws until fully dry.
Step 8: Add ribbon and simple embellishments
- When the paint is dry, tie ribbon or twine through the top of the bauble.
- You can also add a little glue and sprinkle glitter fixed with mod podge on to, or place stickers around the surface if that feels easier than painting.
- Choosing the ribbon colour or sticker design can be enough involvement for someone who finds the painting itself too tiring.
Variations if Painting the Outside Isn’t Working
You can still use the baubles even if painting the outside is too fiddly or difficult. The following variations focus more on pouring, filling, and simple sticking things on ornaments.
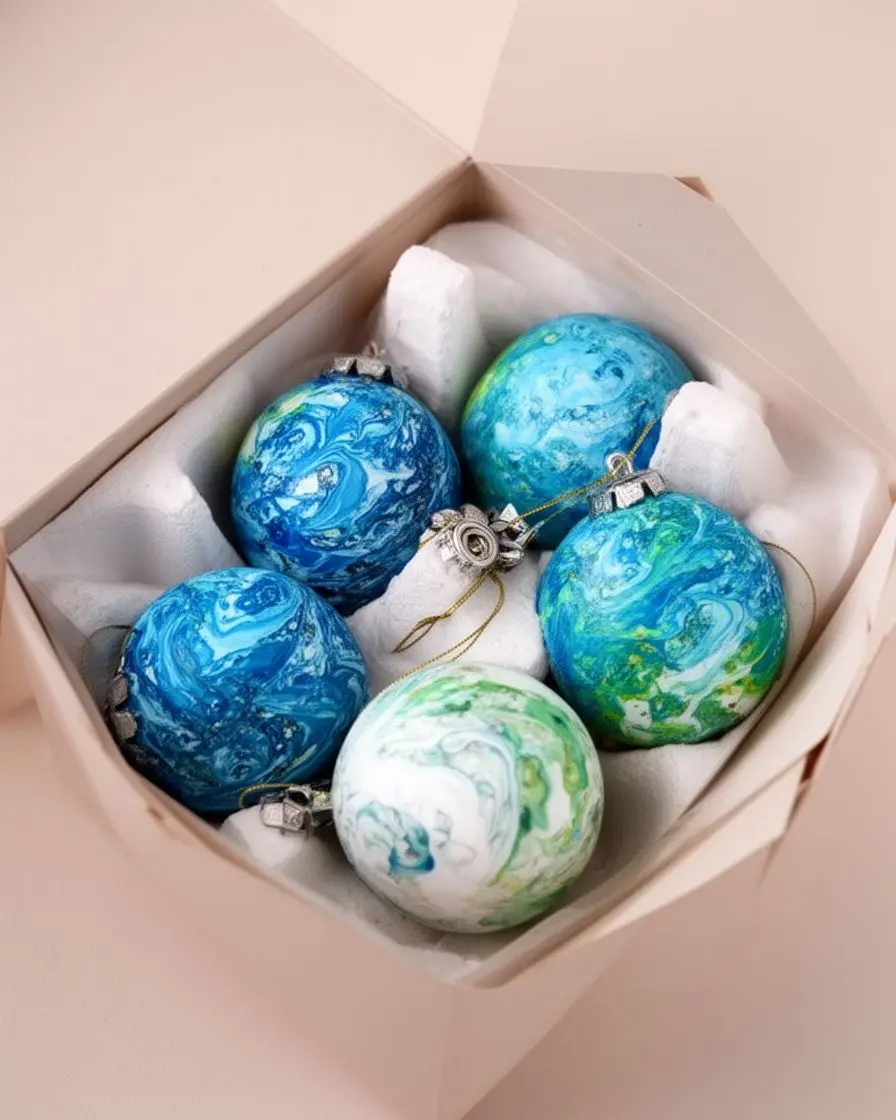
The Marbling Effect for Hand Painted Christmas Ornaments
It’s much easier to simply pour different paint colours into an christmas bauble, swirl it around and create a marble effect without going through the messy process of using nail varnish in water etc.
Step 1: Prepare the bauble
- Remove the top of the bauble so the opening is clear.
- Place the bauble in an egg carton or in bowl or just hold it with your hands
Step 2: Thin the paint if needed
- Use cheap, thin acrylic paints or add a small amount of water to regular acrylic paint so it flows more easily.
- Pour a little paint into a small pot or use a squeezy bottle if that is easier to control.
Step 3: Add one or two colours
- Use a funnel if it helps, or carefully tip a small amount of paint straight into the bauble opening.
- Stick with one or two colours so the marbling stands out and doesn’t become one muddy colour.
Step 4: Swirl the paint
- Gently tilt and turn the bauble so the paint coats the inside.
- You can roll it between your hands or cover the top and shake it.
- Stop when you are happy with the coverage
Step 5: Drain the extra paint
- Turn the bauble upside down.
- Rest it on a straw, stick, or knitting needle pushed into styrofoam or an egg carton so the extra paint can drip out.
- Leave it there until the inside looks mostly dry.
Step 6: Finish with ribbon
- Once the paint inside is fully dry, put the top back on the bauble.
- Thread ribbon or twine through and tie a simple knot or bow.
Filling Christmas Ornaments Instead of Painting
This version works well if painting isn’t your thing or too difficult to handle the paintbrushes.
Step 1: Open the bauble -Remove the top so you can see the inside.
Step 2: Add soft fillings – Add pieces of cotton wool or mix coloured tissue paper
Step 3: Add special items – Drop in dried flowers & winter berries, glitter, or beads. If you are using beads or glitter, only add a small amount at a time so it doesn’t become too heavy.
Step 4: Shake gently – Close the bauble and give it a light shake so everything moves around.
Step 5: Add ribbon or twine – Once you are happy with the filling, secure the top and tie ribbon or twine through the loop.
You can add whatever you want inside, small leaves, gems or flower petals, or even beads of different sizes, etc.
Stickers and Embellishments for Handmade Christmas Ornaments
The last method for simple handmade christmas decorations is to simply use stickers.
Step 1: Choose the stickers or embellishments – Lay out a small selection of stickers, or simple stick on shapes.
Step 2: Prepare the bauble surface – Make sure the bauble is dry and free from dust so stickers can stick more easily.
Step 3: Peel and place – Peel one sticker at a time and place it on the bauble. You can start the peel and let your loved one press it down if that is easier. Place them anywhere on the surface, close together or spaced out.
Step 4: Add extra touches if wanted – You can add a small amount of glue and sprinkle a little glitter. Finish with ribbon or twine through the top.
Adapting for Dementia or Limited Dexterity
- Use tools with larger grips when possible
- Keep steps short and visible
- Avoid rushing or moving on too quickly
- Let familiar textures lead the pace, cotton wool, tissue, ribbon, glitter
- Allow pauses without calling attention to them
- If the funnel feels awkward, you can hold it steady while your loved one pours, or skip it and pour paint or fillings straight from a small pot.
- If attention drifts, offer two clear choices, such as “red or blue,” instead of open questions.
- If tools cause frustration, you can work together using adaptive tools, hand under hand support, or by guiding the movement while still your loved ones lead where possible.
The craft doesn’t need to be finished in one sitting, you can return to them whenever you want. These small changes can keep the activity easier to manage and you continue to have a great time decorating together.
Finally
Once the baubles are done, you can display them, gift them, or store them for another day. Some people like to hang them on door handles, shelf corners, or window hooks so they stay in sight. You can even use them year-round as a decoration rather than keeping them for Christmas. The same approach can be used for any season, just change the colours, switch the filling, or repaint over old ornaments when you want to start again.
This is an easy craft that offers something straightforward to do together with whatever time and energy you have. A few materials and a table is all you need.