
Bubble art ideas for seniors at home work best when there’s a clear outcome to aim for. The process itself stays the same, but a small change in how the prints are used can turn them into something recognisable.
This article shares ten simple bubble art ideas that you can create using various bubble art methods. I’ve noted which method suits each idea best, though most can be adapted depending on what works for the person you’re caring for on the day. A few use simple additions like felt tip pens, stickers, or cut paper shapes can transform your bubble art.
If you haven’t read the main bubble art method article yet, you can find it here, with full instructions on how to make bubble art using methods and tips on adapting everything for limited mobility or dementia.
1. An Underwater Ocean Scene
Best method: Blown bubble prints, frother foam, or plastic bottle printing
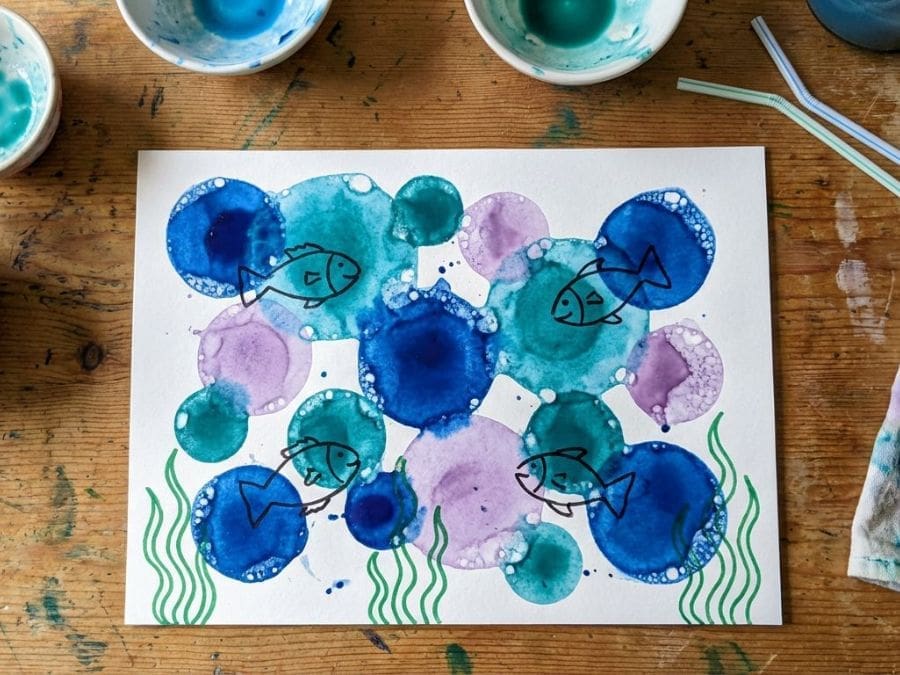
This one never fails to impress, and it’s simpler than it looks. Use blues, greens and a little purple, pressing bubble prints across the whole page or in overlapping layers. The circular shapes naturally suggest bubbles rising through water, so you’re already halfway there before you add anything else. And you can deepen the colours using a paint brush.
Once the paint is dry, use a black or dark blue felt tip to draw simple fish shapes swimming between the bubbles. They don’t need to be detailed, a basic oval with a tail fin is enough. Add a few wavy lines of seaweed at the bottom in a green pen, and perhaps a simple starfish or two.
This works especially well on dark blue paper as an alternative to white if you have it, as the colours pop much more vividly against a darker background.
2. A Blossom Tree in Spring
Best method: Frother foam printing
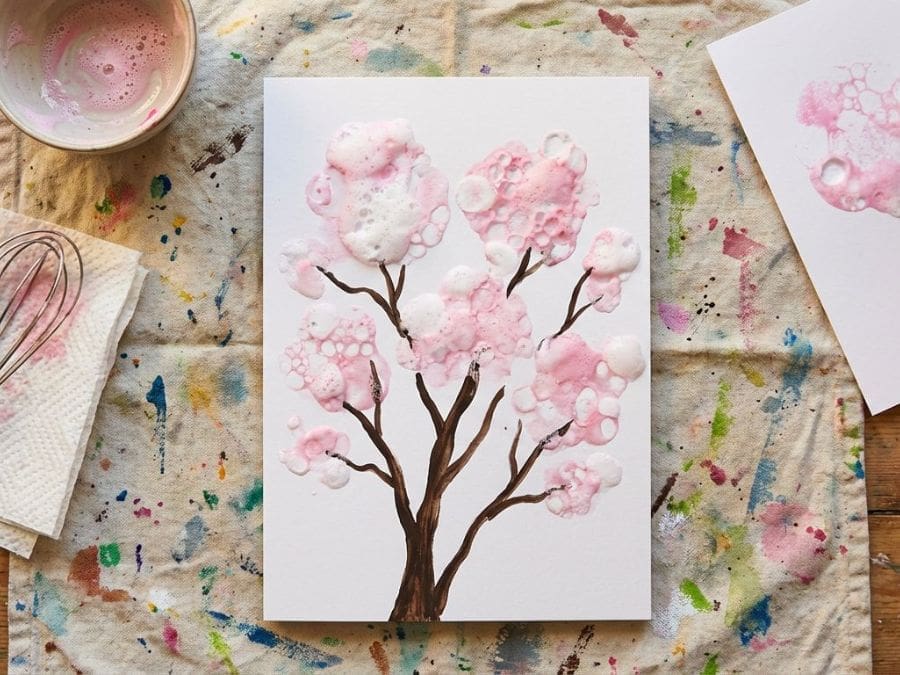
This is a great idea because it looks like something you’d buy in a gift shop, and it takes very little effort. Use pale pinks and whites to create soft foam prints clustered toward the top two thirds of the page. Don’t worry about keeping them neat, the natural messiness of the foam is exactly what gives it that blossom quality.
Once dry, use a thick brown felt tip or a brush and dark paint to draw bare branches rising up from the bottom of the page into the clusters of colour. The branches don’t need to be perfect. In fact, slightly uneven, organic lines look more natural than ruler-straight ones.
This makes a beautiful card for Mother’s Day, a birthday, or just because. If the person you’re caring for isn’t able to add the branches themselves, you can do that part and let them do the foam printing, which is the most satisfying bit anyway.
3. A Bright Sunflower
Best method: Bubble wrap stamping
Cut a piece of bubble wrap into a rough circle, about the size of a large orange. Paint it in bright yellow and orange and press it firmly in the centre of the page. That’s your sunflower head. Scrunch the bubble wrap a little smaller and press a second time slightly overlapping in a deeper orange or brown for the centre of the flower. You can also use a leaf and paint that to act as the petals.
Once dry, use a thick green brush or felt tip to paint a strong straight stem downward from the flower, and add two or three simple oval leaves coming off the sides. You can paint the petals around the outside of the bubble print in yellow if you’d like more definition, or leave it as it is for something more abstract and modern.
A row of three sunflowers across a long piece of paper makes a wonderful piece to frame or use as a card.
4. A Winter Night Sky
Best method: Frother foam printing
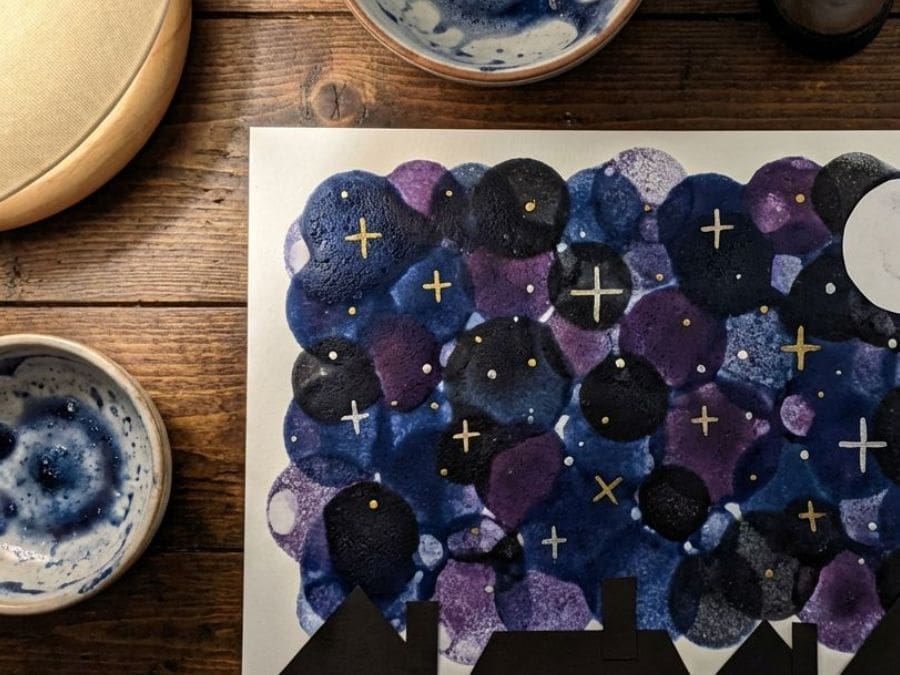
Use deep navy blue, dark purple and a little black to create a dramatic foam print across the whole page. Once it’s dry, add stars using a gold or silver gel pen, just small dots and crosses scattered across the page. You could add a simple white circle for a full moon, or cut one from white paper and stick it on.
This is a particularly good one to make in December to use as a Christmas card or decoration.
5. A Garden in Full Bloom
Best method: Blown bubble prints, bubble wrap stamping, or plastic bottle printing
This one is wonderfully flexible and works at any pace. Print clusters of bubbles in pinks, purples, yellows and reds across the lower two thirds of the page, each cluster suggesting a different flower head.
Once dry, use a green felt tip or brush to connect each cluster of colour to the ground with simple stems, and add a leaves. You can define the flower by going over them in pen. The bubble prints are already doing the job of suggesting flowers, the stems just help the eye make the connection.
This is a wonderful one to do in spring or summer, and it can be as simple or as detailed as the person you’re caring for would like it to be.
6. Autumn Leaves in the Wind
Best method: Blown bubble prints or plastic bottle printing
Autumn colours work beautifully with the blown bubble or plastic bottle method because the overlapping circles naturally suggest leaves tumbling through the air. Use deep oranges, rusty reds, golden yellows and a touch of brown, pressing prints loosely across the page rather than filling every space. Leave some white gaps between clusters to give the impression of movement.
Once dry, you can leave it entirely abstract and it still looks wonderful. Or add simple leaf shapes in felt tip, just a basic oval with a central vein line, dotted here and there between the bubble clusters.
This works particularly well as seasonal decoration around October and November, and makes lovely wrapping paper for autumn birthdays if you use a larger sheet.
7. A Textured Animal Portrait
Best method: Bubble wrap stamping
This idea works beautifully because bubble wrap produces a texture that genuinely resembles the skin or coat of certain animals. An elephant is the most obvious example, press the bubble wrap in greys across a simple elephant outline drawn lightly in pencil first (or you can print off a template shape).. The bumpy texture looks just like wrinkled elephant skin.
The same technique works for a fish with scales (use silvers and blues), a giraffe (yellows and oranges in patches, then add dark brown spots once dry), or a hedgehog (use brown and press the bubble wrap across the back of a simple curved body shape, leaving the face clear).
You can draw the outline yourself beforehand and let the person you’re caring for do the stamping, or do it entirely together. Either way, the result tends to produce a very satisfying moment when you step back and see the finished animal.
8. A Seaside Scene
Best method: Blown bubble prints, plastic bottle printing, and bubble wrap stamping combined
This one combines several methods for a slightly more involved session if you have time and energy for it. Use the blown or bottle bubble method in pale blues and whites across the top half of the page to suggest sea and sky. Then use bubble wrap stamping in sandy yellows and warm beiges along the bottom third for the beach texture.
Once dry, add a few simple details in felt tip or cut paper, a bright yellow sun in the corner, a simple boat outline on the horizon, a red and white striped windbreak stuck on with a small strip of paper. Or leave it more abstract. The two different bubble textures side by side already create a strong sense of place.
This tends to prompt lovely conversations too, about holidays, the seaside, places people have been. That’s often as valuable as the art itself.
9. A Stained Glass Window Effect
Best method: Bubble wrap stamping
This one looks incredibly effective for very little effort. Use a large piece of paper and press the bubble wrap in bold, rich colours, deep red, cobalt blue, emerald green, golden yellow, pressing each colour in a distinct patch or panel rather than blending them together. Leave thin gaps of white between the colour blocks if you can, or draw them in afterwards with a black marker.
Once the paint is dry, use a thick black felt tip or black paint to draw simple dividing lines between the colour sections, like the lead lines in a stained glass window. Add a simple border around the edge in black as well.
Held up to the light, the result is genuinely beautiful and looks far more considered than the process feels. This works wonderfully as a window decoration, taped up where the light can catch it.
10. A Personalised Greetings Card
Best method: Any of the four methods
This last idea isn’t a specific picture so much as a reminder that almost any bubble art print makes a beautiful handmade card. A small piece of thick card with a single foam print in the recipient’s favourite colours, a simple stamped flower in the corner, or a cluster of blown bubble prints in pinks and purples is already something worth giving.
If the person you’re caring for is able to, they can write a message inside or sign their name. If not, you can write it together or on their behalf. There is something genuinely moving about receiving a handmade card, and knowing the person who made it did so with care and with help makes it even more so.
Keep a few finished bubble art prints aside each time you do the activity, and you’ll have a small supply of cards ready for birthdays, Christmas or just a thinking of you moment when you need one.
A Note Before You Start
None of these ideas require the finished piece to look exactly like the description. A seaside scene that looks more like an abstract landscape is still a beautiful thing. A sunflower that’s more of a cheerful yellow blob is still something made with time and intention. The ideas here are starting points, not rules.
Follow the lead of the person you’re caring for, let their choices of colour and pace guide how the session goes, and don’t worry too much about the result. The making is what matters most.
Ready to get started? Head back to the main bubble art guide [here] for full instructions on all three methods.